Create EXE or Setup File in .NET Windows Application
The following steps will gives the elegant guidance to create an exe or installer file.
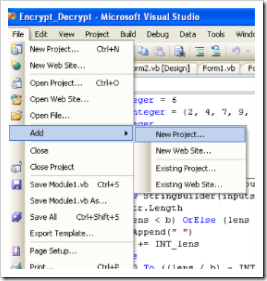
1, Go to file menu > click Add > new project >now “Add New Project” dialog will appear.

2.Select the “Other Project Types” and click “Setup and Deployment” projects,Choose “Setup Project”give name project name in name text box finally click OK.

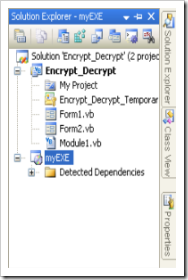
3.New project appear in solution explorer,for eg., you have give the name “MyEXE” file will be displays with given name.

4.Right click the MyEXE > go View > click “File System”

5.You can see the “File System on TargetMachine”under three folders
Application Folder
User’s Desktop
User’s Program Menu

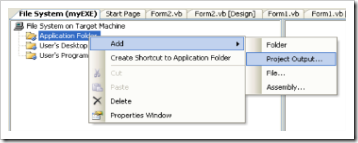
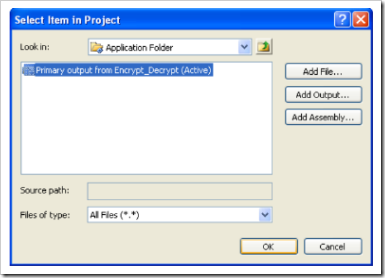
6.Select Application Folder and right click Add>Project Output>select Primary output

7. Select User’s Desktop richt click on the second window>click create new shortcut>select output file from Application folder>change the file name from primary output name to MyEXE

next >>

same procedure follows the user’s program menu also
8.If you want to change the Manufactures name for exe,just right click the project go to properties

change the properties as per you requirement
9.Finally Build the new project After successfully Build the project myEXE(Setup) will be appear in Application Debug or Release folder(depend upon the properties settings)

EXE or installer will be available on his physical path…

When you want to install the EXE on the client machine,you should be installed .NET Framework on that machine because, Applications and controls written for the .NET Framework v2.0 requires the .NET Framework Redistributable Package version 2.0 to be installed on the computer where the application or control runs.
No comments:
Post a Comment